to start off 3,4,5, i put my PPE, which was my work boots. I then got the equiment i needed, stringline, bricks and a tapemeasure.
The idea of this exerise was to make a perfect rectagnle with 90degree angles on the corner. I measued out the lengh of the string to be just over what i needed for the lenghs so there was enough room for crossovers.
two lenghs had to be 4meters long (both paralel) and the other two had to be 3meters long. this means the diaganal from corner to corner would be 5meters, hence 3,4,5.the maths behind it is simple, 3squard + 4squard = 5squard. in this case the area was 25meters squard.
after i laid this out, i had to make a smaller version with in the rectangle. this was exactly the same pinceables but off one of the corners i already made. i made this one to half the size.
Monday, 5 December 2011
Monday, 14 November 2011
English bond
For building a English bond 12 bricks long by 8 bricks high by 2 bricks wide. I started off first by putting on all my PPE, this being my work boots (steel toe-caped), my glasses and my gloves. I then started collecting all my materials. These included: 60 bricks, 2breeze blocks and a board (for the pug to sit on), a trowel, pug, a spirit-level, a pencil, a tape measure, a wire brush, a line gap smoother and a brick gage.
I mixed the pug until it was the right consistence for laying the bricks and I then started to measure the right length for the 12 bricks in length using the tape measure and using the length on the brick chart. and then 2 bricks in width do they are parale.
After marking out the right distance I then began to lay the pug out all the way along the measurements and then laid the bricks on top, with all the ‘faces’ facing outwards towards the egdes, as this would be the fronts of my wall.
After laying the first level I made sure they were all level, plumb and the right height. I done this with every level, and lined up all the bricks to make sure they were all in line as they went up so they were the same space apart on all the levels. All the level were the same apart from every other level a half brick was used on each end to make the wall more stable. I made sure all the bricks were lined up to match every other level.
After it was complete, I brushed the wall down with a wire brush and then smoothed the gaps out with a special tool to make the wall look smarter and more professional
manhole
For building a manhole 3 bricks long by 6 bricks high by 2 and a half bricks wide. I started off first by putting on all my PPE, this being my work boots (steel toe-caped), my glasses and my gloves. I then started collecting all my materials. These included: 60 bricks, 2breeze blocks and a board (for the pug to sit on), a trowel, pug, a spirit-level, a pencil, a tape measure, a wire brush, a line gap smoother and a brick gage.
I mixed the pug until it was the right consistence for laying the bricks and I then started to measure the right length for the 3 bricks in length using the tape measure and using the length on the brick chart. and then 2 and a half bricks in lenght at a 90 degree angle to the line of the first 3 brick. I then continued this exactly the same with symmetry to create a rectangle.
I mixed the pug until it was the right consistence for laying the bricks and I then started to measure the right length for the 3 bricks in length using the tape measure and using the length on the brick chart. and then 2 and a half bricks in lenght at a 90 degree angle to the line of the first 3 brick. I then continued this exactly the same with symmetry to create a rectangle.
After marking out the right distance I then began to lay the pug out all the way along the measurements and then laid the bricks on top, with all the ‘faces’ facing towards me, as this would be the front of my wall.
After laying the first level I made sure they were all level, plumb and the right height. I done this with every level, and lined up all the bricks to make sure they were all in line as they went up so they were the same space apart on all the levels. All the level were the same apart from every other level a half brick was used on each end to make the wall more stable. I made sure all the bricks were lined up to match every other level.
After it was complete, I brushed the wall down with a wire brush and then smoothed the gaps out with a special tool to make the wall look smarter and more professional
Monday, 7 November 2011
Building a wall 12x9
For building a wall 12 bricks long by 9 bricks high I started off first by putting on all my PPE, this being my work boots (steel toe-caped), my glasses and my gloves. I then started collecting all my materials. These included: 108 bricks (some 3 halves2 breeze blocks and a board (for the pug to sit on), a trowel, pug, a spirit-level, a pencil, a tape measure, a wire brush, a line gap smoother and a brick high measure.
I mixed the pug until it was the right consistence for laying the bricks and I then started to measure the right length for the 12 bricks in length using the tape measure and using the length on the brick chart.
After marking out the right distance I then began to lay the pug out all the way along the measurements and then laid the bricks on top, with all the ‘faces’ facing towards me, as this would be the front of my wall.
After laying the first level I made sure they were all level, plumb and the right height. I done this with every level, and lined up all the bricks to make sure they were all in line as they went up so they were the same space apart on all the levels. All the level were the same apart from every other level a half brick was used on each end to make the wall more stable. I made sure all the bricks were lined up to match every other level.
After it was complete, I brushed the wall down with a wire brush and then smoothed the gaps out with a special tool to make the wall look smarter and more professional.


Breeze block pyramid
For building a breeze block pyramid, 3 long by 3 bricks high I started off first by putting on all my PPE, this being my work boots (steel toe-caped), my glasses and my gloves. I then started collecting all my materials. These included: 8 bricks, 2 of the breeze blocks and a board (for the pug to sit on), a trowel, pug, a spirit-level, a pencil, a tape measure, a wire brush and a line gap smoother.
I mixed the pug until it was the right consistence for laying the bricks and I then started to measure the right length for the 3 breeze blocks in length using the tape measure and using the length on the brick chart.
I then laid out my pug in the area measured out for the right length and put my first 3 blocks on. I made sure they were plumb, level and the right height. I done this for each level but one less block per each level, ( 3 long, the second level 2 blocks in length and the final level only 1 block).
After it was complete, I brushed the wall down with a wire brush and then smoothed the gaps out with a special tool to make the wall look smarter and more professional.
Tuesday, 18 October 2011
5 brick fill in
For this task that was with a partner to start off we got our PPE. This was our steel toe capped boots, glasses and gloves. The gloves was to protect out hands from the lime, this is used on dead bodys and slowly rots flesh.
The equipment we used was a board, two breeze blocks to support the board, and then we put pug on the board. Other tools we needed were: a trowel, a spade, bricks, a spirit-level, a tapemeasure and a pencil.
To start off I looked at the brick chart to see what the correct distance (2230mm)
The equipment we used was a board, two breeze blocks to support the board, and then we put pug on the board. Other tools we needed were: a trowel, a spade, bricks, a spirit-level, a tapemeasure and a pencil.
To start off I looked at the brick chart to see what the correct distance (2230mm)
Tuesday, 11 October 2011
Moving the bags of ballast.
To start off, I first looked at the job sheet. From this I then valued the risk assessment on my colleague and then the risk assessment on task. After doing the previous I then checked the delivery sheet to see what I would need to do for the task and what the quantity that I needed to produce was to be. After reading the delivery ticket I signed and agreed to the statement and changed any incorrect parts to the agreement.
I then looked for any risks in the college that could affect me or any workers what were working in the same situation, such as closed doors and then solved the problems but putting door-wedges in so I would be able to support myself with two hands if need be.
Safety boots (steel toe-caped) were worn to protect our feet and gloves and glasses as well as this we were also careful for cars on the road passing. We wore the boots to protect our feet from anything heavy falling on them, the gloves to protect things like splinters and blisters.
I then read the delivery sheet to see what the job was and what quantity was need of each material.
The hazards for this task is that: you can easily strain muscles in your back when your picking up the ballast, or even in your arms or legs. This can lead to a long period off whilst recovering.
Another hazard would to be if the bag of ballast slip and the sand got in your eyes, you would have to wash it out and the sand id irritant to your eyes.
The first task was to move a pallet of sand bags into the class room (12 bags of sand) although 30 were taken in; a pallet was also taken in so the sand bags could be places on top. The bags were laid down three in a row, 6 on each level, every level alternative in the way they had been placed. We then had to repeat this when removing them back outside to their original location.
When carrying the bags we have to bend with our legs and keeping are backs straight. The bags each weighing 25kg were lifted onto our shoulders. Only one was taken at a time to avoid any strains to ourselves.
Moving one ton of ballast
To start off, I first looked at the job sheet. From this I then valued the risk assessment on my colleague and then the risk assessment on task. After doing the previous I then checked the delivery sheet to see what I would need to do for the task and what the quantity that I needed to produce was to be. After reading the delivery ticket I signed and agreed to the statement and changed any incorrect parts to the agreement.
I then looked for any risks in the college that could affect me or any workers what were working in the same situation, such as closed doors and then solved the problems but putting door-wedges in so I would be able to support myself with two hands if need be.
The hazards for this task are similar to the bags of ballast; you could pull a muscle in your back when you’re shovelling the ballast into and out of the bag and when twisting your body. You could then also get the sand in your eyes.
The second job we had to do was to shift a one ton of ballast (sand and stones) from a bad into a pile across the car park. All the same safety hazards and equipment was the same, steel toe capped boats, glasses and gloves. To do this we used spaces and wheelbarrows. We loaded the ballast into the wheelbarrows using the spades and then wheeled the wheelbarrows across the car park and tipped out the content. After unloading the one ton bag we had to load it again using the same methods as before apart from when putting it back into the bag we used spades instead of tipping it in. As the ballast was fair condense we had to dive the space into it and twist the spade to loosen it up, this was a fair effective method. When loading the bad back up we had to be careful to do it correctly and make sure the bag did not crease so it would all fit back in.
Moving paint
To start off, I first looked at the job sheet. From this I then valued the risk assessment on my colleague and then the risk assessment on task. After doing the previous I then checked the delivery sheet to see what I would need to do for the task and what the quantity that I needed to produce was to be. After reading the delivery ticket I signed and agreed to the statement and changed any incorrect parts to the agreement.
I then looked for any risks in the college that could affect me or any workers what were working in the same situation, such as closed doors and then solved the problems but putting door-wedges in so I would be able to support myself with two hands if need be.
Safety boots (steel toe-caped) were worn to protect our feet, gloves to cushion the weight and glasses in case the paint is dropped and splashes in out face.
We wore the boots to protect our feet from anything heavy falling on them, the gloves to protect things like splinters and blisters.
I then read the delivery sheet to see what the job was and what quantity was need of each material.
The hazards for this task are: the strain in the back, legs and arms when lifting the paint, 30kg in total. This could lead to a strain and possibly pulling a muscle in you back, you could also drop the buckets of paint on your feet.
For the pain, each bucket (which had a handle) weighted 15kg each. I carried one in each hand to balance myself out. You have to stack the pain on top of each other, but not too high so that it would be unstable and topple over.
The pain was carried from the store from to the class and then back again, I made two trips, carrying two buckets each time there and back.
Moving plaster board
To start off, I first looked at the job sheet. From this I then valued the risk assessment on my colleague and then the risk assessment on task. After doing the previous I then checked the delivery sheet to see what I would need to do for the task and what the quantity that I needed to produce was to be. After reading the delivery ticket I signed and agreed to the statement and changed any incorrect parts to the agreement.
I then looked for any risks in the college that could affect me or any workers what were working in the same situation, such as closed doors and then solved the problems but putting door-wedges in so I would be able to support myself with two hands if need be.
Safety boots (steel toe-caped) were worn to protect our feet, gloves to cushion the weight and glasses in case the dusty and small chippings get into your eyes.
We wore the boots to protect our feet from anything heavy falling on them, the gloves to protect things like cuts and blisters.
I then read the delivery sheet to see what the job was and what quantity was need of each material.
The hazards for this task is that you could pop your shoulder and arm out when holding the plaster board if you do it wrong if the wind blows on the plaster board.
I picked up the plaster board with a partner, one at the front the other at the back. One hand was underneath the plaster board holding it up whilst it was leaning against my shoulder and griped it with the other hand (being my furthest shoulder) so that the wind didn’t blow it off. It is important to carry it with two people so it didn’t snap like warned on the board. The plaster board I lifted was 9mm thick and around 2 meters; there is more then one type, for example round edged and ones with 90degree corners.
Moving 5 bricks up a hill in a wheelbarrow
To start off, I first looked at the job sheet. From this I then valued the risk assessment on my colleague and then the risk assessment on task. After doing the previous I then checked the delivery sheet to see what I would need to do for the task and what the quantity that I needed to produce was to be. After reading the delivery ticket I signed and agreed to the statement and changed any incorrect parts to the agreement.
I then looked for any risks in the college that could affect me or any workers what were working in the same situation, such as closed doors and then solved the problems but putting door-wedges in so I would be able to support myself with two hands if need be.
Safety boots (steel toe-caped) were worn to protect our feet, gloves to cushion the weight and glasses in case the dusty and small chippings get into your eyes.
We wore the boots to protect our feet from anything heavy falling on them, the gloves to protect things like splinters and blisters.
I then read the delivery sheet to see what the job was and what quantity was need of each material.
The hazards for this task are: the strain on the back, legs and arms you get when lifting the wheelbarrow, you could pop your shoulder when you lift the wheelbarrow up.
For this activity, I had to load 5 concrete blocks into a wheelbarrow and wheel it up a hill and down again safety. To make this easier for myself I loaded most of the weight onto the wheel of the wheelbarrow so that I had lesson weight and strain on my arms, back and legs. When I lifted the wheelbarrow I lifted it with my legs so I was to not damage my back. After I had done this I had to load the concrete bricks back onto the pallet and cover them up so they were not to get wet.

Monday, 10 October 2011
Moving 6 bricks
To start off, I first looked at the job sheet. From this I then valued the risk assessment on my colleague and then the risk assessment on task. After doing the previous I then checked the delivery sheet to see what I would need to do for the task and what the quantity that I needed to produce was to be. After reading the delivery ticket I signed and agreed to the statement and changed any incorrect parts to the agreement.
I then looked for any risks in the college that could affect me or any workers what were working in the same situation, such as closed doors and then solved the problems but putting door-wedges in so I would be able to support myself with two hands if need be.
Safety boots (steel toe-caped) were worn to protect our feet, gloves to cushion the weight and glasses in in case the dusty and small chippings get into your eyes.
We wore the boots to protect our feet from anything heavy falling on them, the gloves to protect things like splinters and blisters.
I then read the delivery sheet to see what the job was and what quantity was need of each material.
The hazards for this task are: the strain in the back, legs and arms when lifting the bricks. This could lead to a strain and possibly pulling a muscle in you back or your arms; you could also drop the buckets of bricks on your feet. The dust gathered on the bricks is also a hazard to your eyes.
When I started moving the bricks, I had one as a base and then loaded the bricks alternatively to how the previous one was laid to form a steadier block that is less lightly to fall out my hands. The bricks as laid in pairs apart from the fist one which is just a single brick in the middle so you can get your hands underneath. When picking up the bricks, I used my legs and did not bend my back to cause any strains. When I had done this and move them onto pallet, I had to pick them up and move them back. I laid them alternatively to make them more stable so they did no fall over.

Moving timber
To start off, I first looked at the job sheet. From this I then valued the risk assessment on my colleague and then the risk assessment on task. After doing the previous I then checked the delivery sheet to see what I would need to do for the task and what the quantity that I needed to produce was to be. After reading the delivery ticket I signed and agreed to the statement and changed any incorrect parts to the agreement.
I then looked for any risks in the college that could affect me or any workers what were working in the same situation, such as closed doors and then solved the problems but putting door-wedges in so I would be able to support myself with two hands if need be.
Safety boots (steel toe-caped) were worn to protect our feet, gloves to cushion the weight and glasses in case sawdust or splinters were to get in your eyes.
We wore the boots to protect our feet from anything heavy falling on them, the gloves to protect things like splinters and blisters.
I then read the delivery sheet to see what the job was and what quantity was need of each material.
The hazards for this task are the act the timer is so long is could effect other people around you when you’re moving and hit them, another hazard is splints getting into your skin and infecting you.
The timber is long so you have to be careful you do not hit people when you are carrying it. The right technique is to put it on your shoulder so that you have the central pivoting point there this will mean it will balance so you have to use less energy holding it there and it is the same weight both sides. You have to watch out for splinters and nails in the timber.


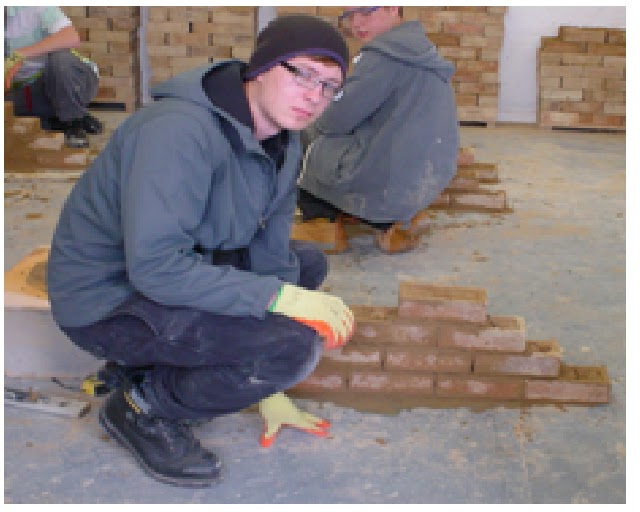
Laying bricking in a pyramid
To start off, I first looked at the job sheet. From this I then valued the risk assessment on my colleague and then the risk assessment on task. After doing the previous I then checked the delivery sheet to see what I would need to do for the task and what the quantity that I needed to produce was to be. After reading the delivery ticket I signed and agreed to the statement and changed any incorrect parts to the agreement.
I then looked for any risks in the college that could affect me or any workers what were working in the same situation, such as closed doors and then solved the problems but putting door-wedges in so I would be able to support myself with two hands if need be.
Safety boots (steel toe-caped) were worn to protect our feet, gloves to cushion the weight and glasses in case dust was to get in my eyes.
We wore the boots to protect our feet from anything heavy falling on them, the gloves to protect things like splinters and blisters.
I then read the delivery sheet to see what the job was and what quantity was need of each material.
For bricklaying I had to build a pyramid, 4 bricks at the bottom, then 3, then 2 and then one on top.
to start I looked at the brick chat and saw that the first 4 bricks had to be laid out at 890mm with a 3mm flexibility. The walls had to be plumb meaning they had to be straight with no angle, bar 90 degrees to the floor.
After collecting my bricks and setting up my area with pug, I firstly mark out the 890mm out with a tape measure and a spirit level marking it with a pencil. I then lay the pug out along the floor and lay the bricks on top, and buttered up every brick on the left hand side, bar the first brick on the edge. The must have the face side facing you.
Hazzards are the fact that some people may be allergic to some of the things in the pug like the lime or thewy may drop a brick on their foot. I then make sure all of the bricks are level, at the right height and the right length, they are all level, flat and then do the next level. I then follow the same process but changing the length every time to the correct one.
After finishing i then had to dismantle the whole pyramid and separate pug and bricks and put everything back where I got it from.
Subscribe to:
Comments (Atom)